Accelerating universal access to 3D Printing

“Modern technology is creating a society of such complex diversity and richness that most people have a greater range of personal choice, wider experience and a more highly developed sense of self-worth than ever before. For the first time, the common man has the opportunity to establish his own identity, to determine who he will be.” -Buckminster Fuller (1970)

3D Printing may not yet be ubiquitous in consumer homes, but that day is approaching fast.

However, we have a bit of a problem with mass adoption of 3D Printing: it’s not such a pleasant experience for the average non-techie consumer.

Meaning, at the moment, the software required to operate these 3D Printers is incredibly complicated and unreliable.

(more…)

Read More

Press Release: AstroPrint Integrates the 3D Slash App, Creating a User-Friendly 3D Platform for Mainstream Users

Press Release

ASTROPRINT INTEGRATES THE 3D SLASH APP,
CREATING A USER-FRIENDLY 3D PLATFORM FOR MAINSTREAM USERS

San Diego, CA and Paris, France, August 11, 2015 – AstroPrint, the cloud 3D printing software platform and 3D Slash, the fun and easy-to-use 3D modeling app, announced their partnership today. The combination of these two user-friendly services will provide all users with an engaging and efficient 3D experience.

Free your mind from complex 3D parameters: AstroPrint and 3D Slash collaborate to offer a simple and intuitive 3D experience, accessible both from PC and mobile devices. Users can now easily create, remix, slice, monitor and 3D print anything, anytime, from anywhere.

A great 3D experience for all users
AstroPrint and 3D Slash both offer smart plug & play tools to anyone wishing to work in 3D trouble-free. With this partnership, users can directly access the 3D Slash modeling app from the AstroPrint dashboard. (more…)

Read More

AstroPrint Tip 5 (of 5): To Infinity and Beyond – Wireless 3D Printing

This is part of our Getting Started series that our space monkeys email to new users.

Greetings AstroPrint-er,

This is the final tip in your Getting Started series for AstroPrint. Don’t be sad the tips are ending, be happy you are now a 3D printing expert! 😉

Tip 5:  To Infinity and Beyond!  Now that you’re hooked on 3D printing, let’s make you a 3D printing rockstar! It’s time to start 3D printing with your phone, tablet, or remote computer.

To print wirelessly, your 3D printer will need to be cloud enabled. Luckily to enable most 3D printers you simply need to plug an AstroBox into it. There are two ways you can get an AstroBox:

  • Pick one up online, here.
  • Make one yourself out of a Raspberry Pi. The AstroBox software for the RPi is totally free, but you’ll have to buy a few pieces of hardware. This is just for techies, and instructions can be found here.

Setup of the AstroBox is incredibly simple, check out this video to see how its done.

Learn More About the AstroBox

What can you do with a wireless enabled 3D printer, you ask?

  • Start and stop prints from any web enabled device (phone, tablet, remote computer).
  • Remote Monitoring of prints (requires a web camera).
  • Share timelapses of your prints to FB and YouTube.
  • Ability to start prints directly from the internet, and certain websites.
  • And much more.

Thanks for following our Getting Started tips! Please let us know if you found these tips helpful, awesome, boring, and/or terrible! Simply reply to this email to let us know.  :–)

We’ll see you on the AstroPrint Mothership!

The AstroPrint Team


Other tips in this series:

Tip 1: Fuel Up! – Getting Started with 3D Designs

Tip 2: Prepare to Launch – Slicing and Advanced Settings

Tip 3: Take Off – All the ways to print with AstroPrint

Tip 4: The Space Station – All about 3D Printing Apps

Tip 5: To Infinity and Beyond – Wireless 3D Printing

Read More

AstroPrint Tip 4 (of 5): The Space Station – All About 3D Printing Apps

This is part of our Getting Started series that our space monkeys email to new users.

Hi AstroPrint-ers,

This is tip #4 in a series of 5 Getting Started tips designed to make 3D printing easy and fun.

Welcome to the AstroPrint Space Station (aka the AstroPrint App store). This is where developers, designers, and sometimes aliens, all come together to offer you amazing apps for your 3D printer.

Here are the most common types of apps you are likely to encounter:

  • 3D Design Marketplaces – may offer literally millions of 3D models that you can print with a single click. Some examples include Thingiverse and CGTrader.
  • CAD tools – (computer assisted design) that let users create and modify designs before printing, all from the comfort of their AstroPrint cockpit. No need to download and learn complicated programs. A great place to start is 3D Slash, a Minecraft style CAD tool that lets anyone design and print, regardless of technical skill.
  • 3D Printing Utilities – that simply make your 3D printer more awesome. App examples include Remote Printer Monitoring, Advanced File Repair (powered by Materialise), and engineering grade structural analysis of designs.

The AstroPrint app store is powered by amazing developers and designers that are creating the next generation of 3D printing tools, games, utilities, and more. Just like the early days of the Smartphone App stores, no one knows what magical applications these developers will think of next. Keep checking in to see what they dream up!

Check Out Some 3D Printing Apps Here

See you at the Space Station! Over and out,

The AstroPrint Team


Other tips in this series:

Tip 1: Fuel Up! – Getting Started with 3D Designs

Tip 2: Prepare to Launch – Slicing and Advanced Settings

Tip 3: Take Off – All the ways to print with AstroPrint

Tip 4: The Space Station – All about 3D Printing Apps

Tip 5: To Infinity and Beyond – Wireless 3D Printing

Read More
AstroPrint Tip 3 (of 5): Take Off! All the Ways to Print with AstroPrint

This is part of our Getting Started series that we email to new users.

Hi AstroPrint-er,

This is tip #3 in a series of 5 tips designed to make 3D printing easy and fun.

Tip #3 (of 5): Take Off – All the ways to print with AstroPrint

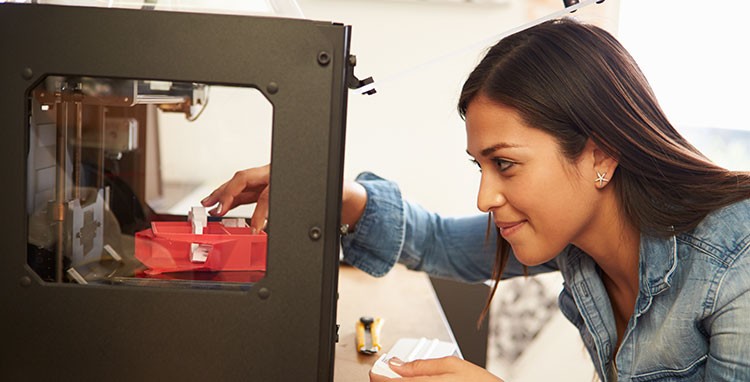
So, you found a cool 3D design, our space monkeys prepared it for printing, and now you want to print it, right? You’re in luck, there are 3 different ways you can make this happen.

  • Print wirelessly on your AstroPrint enabled 3D printer.
    • Simply hit “print now” beside the print file (in your File Manager) and you will see a list of the AstroPrint enabled 3D printers you are logged into.
    • If your 3D printer is not AstroPrint enabled, you’ll need an AstroBox to upgrade it.  We’ll cover that in Tip 5, but here’s a quick video about it.
  • Download the print file to your computer.
    • This file is a .GCODE (or .x3g) and can be printed through nearly any 3D printing software program, or loaded onto an SD card and printed manually.
  • Have Space Monkeys print the file and mail it to you.
    • They’ll even print in exotic materials such as porcelain, stainless steel, or gold plating!  Ok, you caught me…  Space Monkeys don’t really print your design…  They actually send your design to our partner i.materialise for printing.  Here’s a video of how they do it.

Thanks for reading tip #3!  #4 will be here soon, try and keep your excitement contained, if possible!

Viva La Revolución,

The AstroPrint Team


Other tips in this series:

Tip 1: Fuel Up! – Getting Started with 3D Designs

Tip 2: Prepare to Launch – Slicing and Advanced Settings

Tip 3: Take Off – All the ways to print with AstroPrint

Tip 4: The Space Station – All about 3D Printing Apps

Tip 5: To Infinity and Beyond – Wireless 3D Printing

Read More
AstroPrint Tip 2 (of 5): Preparing to Launch – Slicing and Advanced Settings in AstroPrint

This is part of our Getting Started series that our space monkeys email to new users.

Hi AstroPrint-er,

This is tip #2 in a series of 5 tips designed to make 3D printing easy and fun.

Tip 2 (of 5): Preparing to Launch – Before you can 3D print the designs in your AstroPrint account, you need to prepare them for printing. This process is often called slicing. A slicing program takes a 3D design and breaks it down into numerous layers (slices) in the same way that an MRI does. It then figures out the instructions your printer needs to build each layer.

That may sound complicated, but we have a team of space monkeys that will do it for you. To put them to work, simply:

  • Login to your account
  • Select a 3D design in your file manager and click “make print file.”
  • Select your printer, material, and print quality, then hit the Slice button.
  • You’re done! The space monkeys love slicing files (and bananas) and will get on it immediately.

Try It Out, Slice a Model Now

For beginners, that’s all you need to know about slicing. You can now 3D print your file wirelessly with AstroPrint, or download it to an SD card to print the old fashioned way. (See Tip 3 for more details)

Our Space Monkeys have a lot of other skillz advanced users will likely appreciate. They:

  • Keep both Slic3r and Cura Engine updated to the latest stable release. This lets you use either one, whenever you wish, with no need to upgrade/update a slicer, ever.
  • Optimize slicer settings by manufacturer recommendations.
  • Work with any advanced slicer setting you wish. Simply click “Advanced Settings” on the slicing screen to send them custom Cura/Slic3r settings.

Keep your eyes peeled for Tip 3, coming in a few days!

Your #1 fan,

The AstroPrint Team


Tip 1: Fuel Up! – Getting Started with 3D Designs

Tip 2: Prepare to Launch – Slicing and Advanced Settings

Tip 3: Take Off – All the ways to print with AstroPrint

Tip 4: The Space Station – All about 3D Printing Apps

Tip 5: To Infinity and Beyond – Wireless 3D Printing

Read More

AstroPrint Tip 1 (of 5): Fuel Up! Getting Started with 3D Designs

This is part of our Getting Started series that our space monkeys email to new users.

Hi AstroPrint-er,

As a reminder, this is tip #1 of a series of 5 getting started tips you’ll receive over the next 2 weeks. Please reply to this email to let us know what you think of AstroPrint and these tips. Enjoy!

Tip 1 (of 5): Fuel Up! To get started on your 3D printing journey, you’ll need some 3D designs in your AstroPrint.com account. Here are a few ways to get started:

  • Search for designs in AstroPrint Apps.
    • You can find about anything you could ever want to print via our AstroApps. Search for designs on apps like Thingiverse and Yeggi, or make your own with simple CAD tools like 3D Slash.  Try a 3D Printing App Now
  • Import from AstroPrint enabled websites.
    • Import or print straight from websites like WaterTight, 3DaGoGo, and more.
    • Check out this video of using AstroPrint to print directly from the NIH website!
  • Upload your own.
    • No explanation necessary (hopefully). Just upload your 3D model and start printing. 🙂

Keep your eyes peeled for our next tip which covers how to prepare your 3D design for printing.

Hugs,

The AstroPrint Team


Other tips you’ll be receiving soon:

Tip 1: Fuel Up! – Getting Started with 3D Designs

Tip 2: Prepare to Launch – Slicing and Advanced Settings

Tip 3: Take Off – All the ways to print with AstroPrint

Tip 4: The Space Station – All about 3D Printing Apps

Tip 5: To Infinity and Beyond – Wireless 3D Printing

Read More

Share 3D Models with Friends or the Public

We’re always pumping out new features here at AstroPrint HQ, but we’re especially excited about this one!  It’s been highly requested and now it’s ready to roll.

As an AstroPrint user, you can now share 3D models through Facebook, Twitter, or a special link.  People that you share a model with can view it, share it, print it, or have it printed through a printing service.

Here’s how it works:

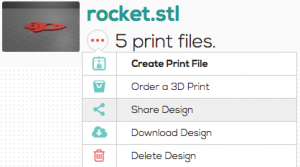
Share 3D Design on AstroPrint1) Find a sharable 3D model in your AstroPrint File Manager.  Sharable 3D models are ones that you have uploaded.  If you imported the model from a marketplace (such as WaterTight, 3DaGoGo, or MyMiniFactory) you will not be able to share the model.  (This is to protect the original designer.)  Click “Share Design.”

(more…)

Read More