Why Project Folders?
By popular demand, you now have the ability to neatly organize all of your designs and print files directly inside the File Manager. The need for this feature came out of our users voicing their frustrations on our forums about the difficulty of organizing files within the AstroPrint File Manager.
Our solution is quite simple: Project Folders.
File organization has always been a fundamental necessity in the history of computing, and 3D Printing is no exception.
Being one of the most popular cloud platforms for 3D Printing, organizing design files on AstroPrint is an absolute necessity.
Now, keep in mind that this is only the first version. Meaning, it’s not perfect.
We will be improving this feature in future iterations based on your feedback.
As always, if you have any suggestions on improving the workflow and making this feature more intuitive, please let us know via our forums or on twitter.
This feature is likely going to evolve into one of the most used features of the AstroPrint File Manager.
Enough chitter chatter, so how the heck do you actually use Project Folders?
It’s quite simple. Let me show you how.
Creating a new Project
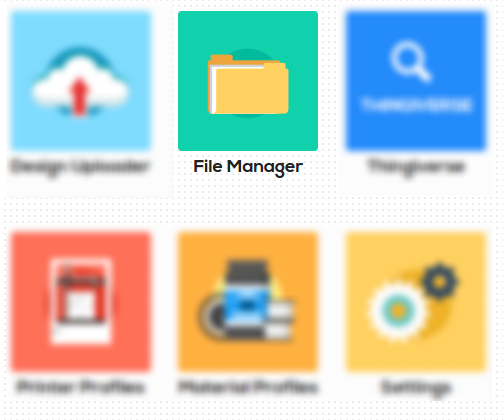
- First, you want to fire up the File Manager.
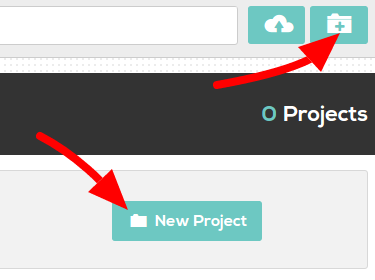
- There are two main ways to create a new Project. You can either click the button located on the upper right-hand corner of your screen (next to the Upload button) OR you can simply click the New Project button.
- Note: Keep in mind that the New Project button only shows up when you have 0 projects. After you have created a Project, you’ll have to use the smaller button on the top right-hand corner to create additional Projects.
- Once you have clicked either button to create a new project, simply assign a name for your new project. Don’t worry, you can rename this later if you change your mind.

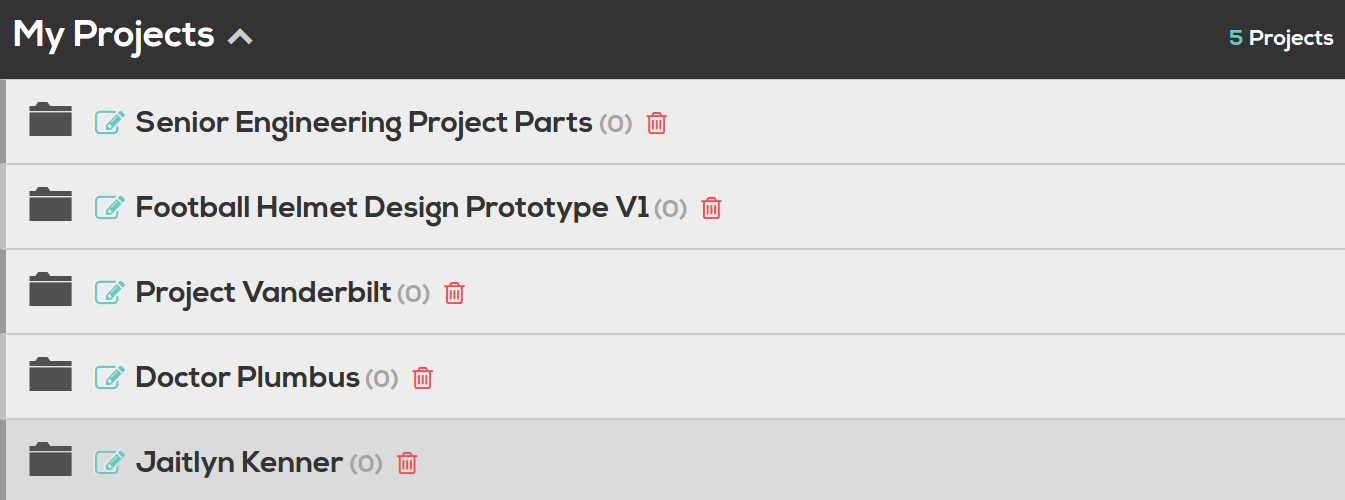
- Once you create your project(s), you’ll see them ABOVE the rest of your designs in the File Manager in a dedicated section called My Projects. In this section, you can also rename or delete your projects.
Moving designs from File Manager to Projects
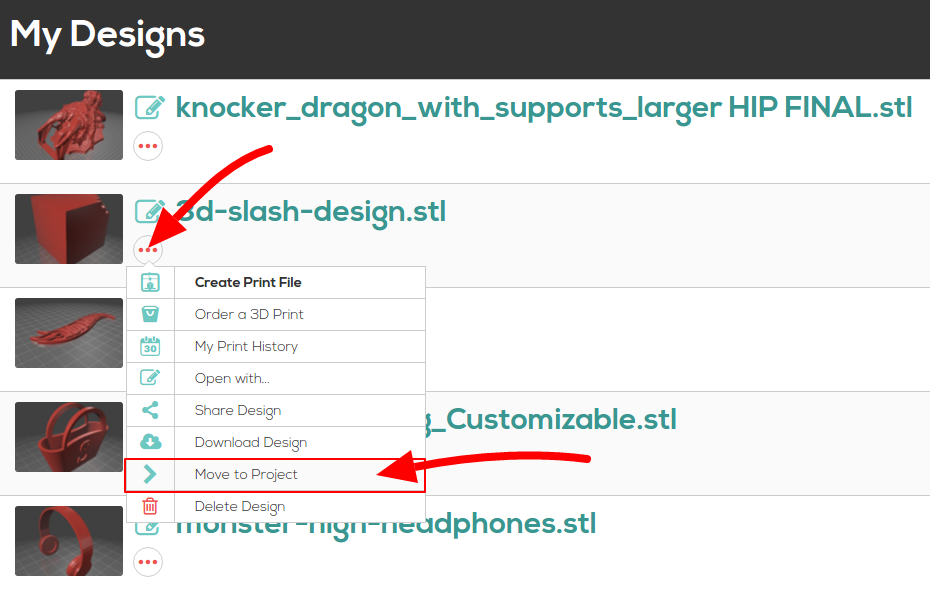
- You also have the option of moving existing files from the File Manager to an existing Project Folder. This should be a convenient way to move specific designs into your Project Folder for better organization.
Moving designs from Projects to File Manager
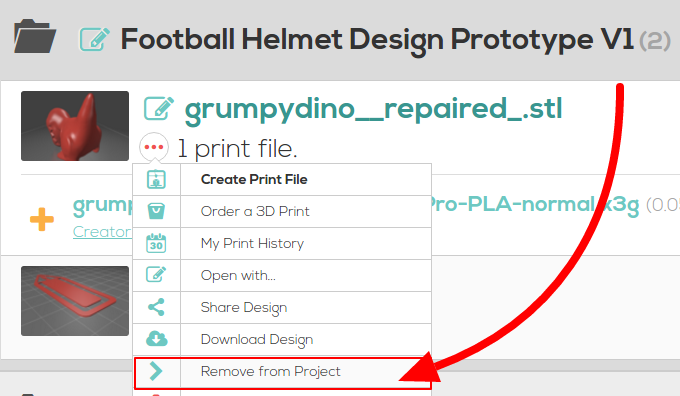
- If you’d like to move a design from one of your Project Folders to the File Manager, simply click the circle with the 3 red dots to bring up the context menu, then choose “Remove from Project“. This will remove the file from a Project and place it back in the File Manager.
Deleting Projects

- Warning: If you remove/delete a Project Folder containing design files, you will lose everything. Just in case you accidentally pressed “Delete” on a Project folder, you’ll be asked for confirmation, however.

That’s it!
You have just become a much more organized human being 🙂
If you have any suggestions on improving the workflow of this feature, please let us know via our forums or twitter. As always, we make a concerted effort to incorporate your feedback into future iteration(s) of AstroPrint.

